dreamshark: (Default)

I started out to do this one simple thing and I am now on Day 2 and counting. Back in 2015 I made Richard a little photo album showing the progression of his Halloween display from 2003 onwards. Since I was in the midst of creating my first Lena Album on Shutterfly, I just printed off a couple of dozen digitized pictures and stuck them in one of those cheap little magnetic page photo books that was lying around empty. Yes, I know those albums are terrible, but it was empty and the pages still had stickum on them and that part of the project was actually quick and easy. Every now and then someone stuck a few more photos in the back but I didn't keep it up.

So now it's Halloween again and we were flipping through the album to see just when we bought that first giant inflatable pumpkin (2005 apparently! Those things used to last so much longer than the ones they make today!). But the pictures were falling out like autumn leaves, and Richard was sad that the book stopped in 2017. So I said, no problem, I'll just stick those pictures back down and add a few more. Yep. I spent most of yesterday working on that, and now most of today, and somehow I'm just further from the finish line. 

First off, why don't I just throw away that nasty old album and start over? Well, for one thing, while half of the old photos are falling out, the other half are welded to the pages and I don't want to wreck them by trying to pry them out. But mostly because Richard loved this album so much that he created this hand-painted cover for it, which is also welded to the front cover and it would take a Renaissance painting restoration artist to remove it intact.


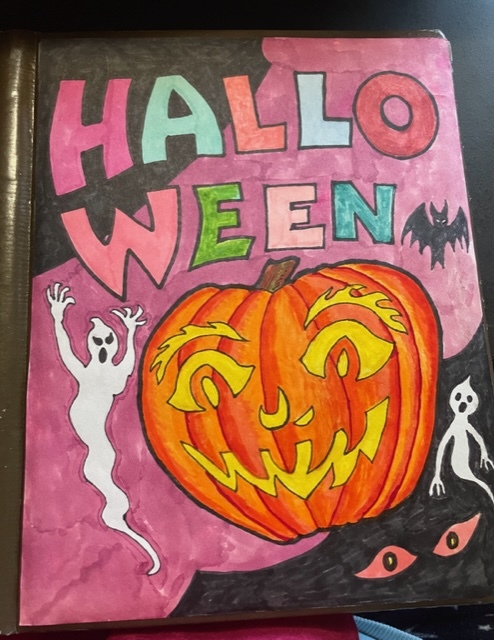
So I just tacked down the loose pictures and removed the detached plastic covers and everything was going  fine until I noticed that I was missing pictures for a couple of years. So I printed them out and replaced a few redundant photos and shifted things around, and it took a little longer than expected but not THAT long. Then I got to 2015, which had 3 pages of pictures taken by a random photographer who happened by, took pictures and sent us copies. His camera was better than mine so they look nice, but none of them really record the display the way we would do it. Mostly cute pictures of us posed in front of the pumpkins. So I removed most of those to make room for  more recent pictures. 

I have a fairly nice printer, good enough for scrapbooking anyway, so I thought I'd just print out some photos and stick them in. But the Halloween pictures turned out to be scattered all over the place, and it took most of yesterday to gather them into one Google Photos album. But now there are about 100 photos in that album, so I had to sort through them and pick out a dozen or so to print. That took a large part of yesterday. 

So today I was finally ready to start printing them. But to do that I have to download them to my computer and rename them so they appear in the right order for sorting them into groups for multipage printing. At which point I notice that 4 of the photos are in that dreadful Apple format (HEIC) that is incompatible with everything. No problem, I have a little converter app somewhere that can handle HEIC. But where did it go? I can't find it anywhere? I downloaded it just last year from the Microsoft Store, but it's vanished from my computer. Also from the Microsoft Store. WTF?? Did Microsoft DELETE AN APP FROM MY COMPUTER because they no longer support it??  I don't know, but iMazing is still out there and still has the free download on their site, so I downloaded and installed it and converted the nonconformist pictures. Okay, now I have a nice ordered set of pictures. But somehow the number has grown to 19, which clearly isn't going to fit in the 5 empty pages at the end of this album. sigh  

Well, I do have another empty 8.5x11 album, this one of nice scrapbooking quality. I guess I'll start a Volume 2. Where do I start? I guess print out one year at a time and stick them in the old album until I run out of space and then think about Volume 2. And so it goes.

dreamshark: (Default)
It's exactly 2 weeks since I tested positive for COVID and I feel fine!  I thought I felt fine 3 or 4 days ago, but I feel better now. I'm actually feeling energetic, which is much better than "I no longer have trouble staying awake in late afternoon." My post-COVID sniffles and cough have seamlessly transitioned to My Normal for mid-August (hello, ragweed pollen!). I thought I was well when my appetite came back, but it came back kind of unhinged, with my body trying to gain back the 3 pounds I lost while sick. Today I'm just normally hungry and able to consider eating balanced meals instead of unlimited amounts of ice cream. So I went grocery shopping and stocked up on healthy food.

The rest of today is slated for Putting Stuff Away

I found some good deals on fresh meat (as I always seem to at Cub), but some of it is in large packages that must be broken up and labeled and frozen. I stocked up on toilet paper, which must be stashed behind the towels in the linen closet. I've removed the car seats from our vehicles, packed them back into their enormous boxes, and wrestled them down to the basement. Over the course of the past 3 days I have packed up all those bulky toddler toys I got for the grandkids' visit and now must find somewhere to put THOSE boxes. And then there's a ridiculous project involving moving many boxes of comic books so I can access a hidden outlet behind a heavy oak shelving unit. And then putting the comics back, which matches the theme for the day. 


dreamshark: (Default)
 Taking advantage of the spring cleaning urge by tackling my closets, looking for stuff to donate to Goodwill. I managed to fill a couple of medium sized boxes with decent donatable clothing and two grocery bags with rags and throwaways. According to The Internet, larger thrift stores don't mind getting rags - they actually have avenues to recycle them that ordinary folk have no access to. At least ever since the old Rag Stock went hipster upscale and stopped taking donations of rags. Anybody else remember when it was called The Rag Factory? 

I also unearthed a surprising number of perfectly wearable, surprisingly nice looking pieces of clothing that had just gotten log-jammed in the back. Now I'm in the middle of a project to add pockets to as many skirts and dresses as possible, which is also a nice way to use up scraps of fabric. Know what makes really good pockets?  Old pillow cases and sheets. 

At Richard's suggestion I expanded my throwaway projects outside and got rid of the 4 tires that some asshole had dumped behind our garage. Man, is it a lot of work to dispose of tires!!! In keeping with its general policy of offering superb garbage and recycling services, Minneapolis does have a way to do this for free, but it's a multi-step, time-consuming process. It's actually harder to get rid of tires than hazardous waste. If anybody ever discovers a cheap, easy way to recycle rubber, the planet will breathe a sigh of relief. 
dreamshark: (Default)
 I called the Mpls Solid Waste number and after a couple of runs around a voice mail loop got someone who told me to just put it out with the garbage labeled "solid waste."  Yay for Minneapolis and their stellar waste collection services!!  

So Richard and Thorin rolled it up and tied it with a couple of ropes and then all three of us heaved it out the back window. Yow! As Lydy warned, that thing is freaking HEAVY. The guys seem to think that they can wrestle it to the alley without me, so I'm letting them work on it. 

Meanwhile, the wooden water bed platform has some drying out to do. Turns out it was leaking in more places than we realized and there is a lot of wet wood. Fortunately, the platform seems to be made of extremely good quality plywood and shows no sign of splitting or rotting. I hope there's a new liner in that waterbed mattress box, as the old one was pretty much done for and is rolled up along with the mattress.

ETA: I knew that was too easy. When I opened up the box with the new waterbed it did NOT contain a liner. I double-checked the invoice, and it definitely listed a liner as part of the purchase. Called the store. Apparently a miscommunication of some sort - he seemed to think that I had decided to get the "value package" without the liner after he had already typed up the invoice or some such thing. That wasn't my understanding. And I didn't feel like another 50 mile round-trip drive to pick up the liner. So he agreed to "send it down on the truck," which would get it here tomorrow. But then he called back and said the truck had left already so it won't arrive until Thursday. *sigh*  So two more nights in the guest room. At least that will give the plywood time to dry out thoroughly.
dreamshark: (Default)
 So far so good. Following tips from seekerval (LJ only) and [personal profile] lydy , we trekked to the far NW suburb of Anoka and purchased a replacement waterbed mattress. There was, guess what, construction on Hwy 169, but other than that it was a pretty easy trip. But by the time we got home it seemed too late to start a major project so we both slept in alternative locations for yet another night. Today we stripped the old waterbed, ran a hose through the window, and started draining it. I vaguely remember last time we did this trying to pour water from a pitcher into the end of the hose to get the air out (WTF?). This time we turned the hose on long enough to fill it with water. Duh. What were we thinking? Anyway, working fine so far - hose is currently watering the highly invasive buckthorn hedge. 
dreamshark: (sharon tire)
We're heading out of town tomorrow to help Amber move, and our kitchen sink has sprung a leak. I'm desperately trying to find a reliable, honest plumber who is available today to fix it before we leave. Probably going to be impossible, but I'm making calls.

Backup plan - wrap the pipe with plumbing tape for a temporary fix and get the plumber in after we come back in late July. Still could use a recommendation.  Anybody?

[ETA] After several fruitless calls I finally found a plumber who was able to fit us in today and had good reviews on Yelp:  Uptown Plumbing. They're supposed to be here between 3 and 5. Here's hoping they show up, since we're on a plane to San Jose at 7am tomorrow.
dreamshark: (sharon tire)
That's the estimated number of abandoned underground fuel oil tanks in the metro area. Yikes! So anybody who thinks that Dean's Tanks is limiting their future by doing only one thing (residential fuel oil tank removal) should think again. And if you happen to have one in your back yard, these are the guys to call.

I know that hiring a contractor is supposed to involving painstakingly interviewing multiple candidates and choosing among competing estimates. But so far in our oil-to-gas boiler conversion, the first one was so obviously the right one that I just hired them on the spot. Pete the Boiler Guy and the Asbestos Abatement firm formerly known as Aardvark really were just perfect, so I'm trying for a hat trick. Just one look at the Dean's Tank web page makes it clear that we're talking about another little family-owned business that has been doing one thing for decades and takes pride in doing that thing really really well.

Anyway, I called the number and got Doug, the owner (Dean was his father). He just happened to be in the neighborhood doing another estimate, so he came right over. Took a few measurements and concluded that the tank runs under the backyard retaining wall and would be impossible to remove without wrecking the yard. Which makes it a perfect candidate for "in-place abandonment." That requires a removal waiver from the city inspector, but no problem - Doug works with him all the time and was sure it would be no problem.

The estimated price sounded very reasonable, considering it includes $500 worth of permits, removing and recycling the oil in the tank, removing all filler pipes, and even patching the basement floor after they dig the fuel line out of it. So I said sure - when can you start?

20 minutes after he left, Doug called back. He's already gotten approval from the city inspector, sight unseen. So I guess he was serious when he said the inspector trusts his judgment. If the permits come through without delay he hopes to have it done in the next two weeks. 
dreamshark: (sharon tire)
There are horrible crashes, clangs, and grinding noises coming from the basement as the Aardvark Asbestos Abatement Company destroys our 100-year-old boiler. 
dreamshark: (sharon tire)
Okay, all the sff paperbacks are on shelves with their spines visible! Well, for certain values of "all."  I'm not counting the anthologies, but those will fit on the shelves downstairs in the den if I don't find a better place for them. And, most important, I'm not counting the probably THOUSANDS of books that Richard has hidden away in the den - many of them on shelves but probably not all of them. These are newer, bloated size paperbacks, mostly of a genre I have no interest in. So for the purposes of this project I'm pretending they don't exist, except for when I find little caches of books that I feel are longing to be reunited with their sisters in the back room (like all that Mercedes Lackey).

However, I am not satisfied with the way things are arranged: A's and B's in the hall, B's in the shelf by the attic step, C's and D's on the shelves in the middle of the office, and so on. I want them to flow logically from A-Z, and I'd rather not use so many of the hardback-sized shelves for paperbacks.

So ideally I will finish up this project by adding a new set of paperback shelves in the hall where the tipsy pile of books and comics used to be. Unfortunately, as far as I know, nobody actually sells paperback shelves. The best I can probably do is a much-too-deep cabinet with movable shelves (and preferably extra shelves for sale as piece parts). Width should be somewhere between 36-41" and height between 45" and 60". Ideally, depth would be no more than 6" but I don't think anybody sells shelves like that. Depth could be as much as 11-1/2" without exceeding the space. Richard has some in the den that more or less fill the bill (except that they are in use, of course). He thinks he got them at Menards. Anybody have any other suggestions?

ETA: It looks like the best bet is to search for DVD or "multi-media" storage units. I still find it mind-boggling that NOBODY makes shelves for paperback storage, but as far as I can tell that is in fact the case. And even compact DVD shelves are hard to come by. A CD/DVD case is less than 6" deep, but most of the storage systems have shelves that are 9.5" deep. Why??

But this one doesn't look too bad. The shelves are only 7" deep and adjustable and the whole unit is about the size I want. I'm more in the mood to just go out and BUY the shelves I want, put them together and finish this project. But if that is just impossible, I can order these.
dreamshark: (sharon tire)
Look what I found inside my window - an old wasp's nest!! Even though it looks like it's been there since ancient Roman times and is obviously empty, I'm afraid to touch it.

There's also a lot of dust and not two, but FOUR sash weights. I'll be darned - double hung windows! The top casements are so thoroughly cemented in with layers of paint that it never occurred to me that they could move.

dreamshark: (sharon tire)
You know what a sash weight is, right?  You've got your old window casement made of solid oak and it weighs a ton, so there is no way to raise the window without a counterweight. So there's these little ropes running up the inside of the window frame and over a pulley and into a dark place where they are attached to heavy iron weights. This works great for about 80 years - then the ropes start breaking. To replace the sash weight cords, you remove the window casement and open up the little doors on either side of the window frame so you can get at the sash weights and replace the cords. When we first moved into this house (almost 30 years ago) I found most of the sash cords broken, and spent a week or so industriously replacing them so I know how to do this.

Then I got to the master bedroom and was stymied. There are 4 windows in that room, and none of them have sash weight doors. Some of the windows still had one sash cord when we moved in, but in the intervening years all but one has broken. This makes those windows damn hard to open, as they weigh a TON. Every now and then I take out one of the window casements, stare at the interior of the window frame in perplexity, and then put the casement back in. Really, NO DOOR.

Today I was hanging some mini-blinds in there and decided to try one more time before I screwed the blinds bracket into the window stop, thus making it that much harder to get the window out. Once again, no sash weight door. So I decided to just dismantle the damn window. Specifically I am prying off the piece of woodwork between two of the windows, hoping against hope that the sash weight for the right side of the left hand window and the left side of the right hand window are in there. More to come...
dreamshark: (sharon tire)
Richard went out to turn over the compost yesterday, and guess what was living in it? Ouch. Fortunately he got away with only 3 stings, but he wasn't happy. Now he's trying to figure out what to do about it. The usual methods (e.g., pouring kerosene down the hole and setting it on fire) would result in destroying or poisoning the compost. He's wondering if soaking the pile with water would flood them out.

My suggestion is to wait for the first frost. But I think he was hoping to use some of the composted material before then. Any ideas?
dreamshark: (sharon tire)
After we had to construct a makeshift bed in the attic for [livejournal.com profile] vgqn and [livejournal.com profile] magscanner when they honored us with a visit last month I've been thinking that it's time to give Amber's old room a makeover. It is now used primarily for sorting laundry, occasional sewing, reading or napping, and occasionally as a guest room. It's not functioning especially well for any of those uses.  It's a small room (10' x 12') with windows, doors and radiator in awkward places. But I have an idea how to rearrange it to make it more usable. This requires the dreaded Sorting and Winnowing activity. I've been working on it sporadically for several weeks and just last night got to the point where I could vacuum the closet floor. As anybody who has done this sort of thing before understands, this is a major turning point. Although the room is now a complete mess, I am nearly to the point where I can start restowing the stuff I've decided to keep. Yay!

So it's time to start getting rid of stuff that doesn't make the cut. I'm starting with this darling little Zen Garden that has been sitting sadly on top of Amber's radiator since she went off to college. I put on some New Age music and spent a happy hour raking and arranging it for pictures, so I can attest that it is rather soothing to play with. Wouldn't it make a lovely gift?

I've posted it on Freecycle, but if anybody on LJ would like it, you can have first dibs.
ZenGarden
dreamshark: (sharon tire)
When my work somehow acquires a fan, I try to oblige.  :-)
Gaudi Tile Gaudi Tile Closeup of replacement tile in shower


dreamshark: (cow)
With these four final projects, the bathroom renovation project is declared complete. All four turned out to be much more complicated than expected. I'd been trying to find a replacement light for the broken sconce on the right side of the mirror for years, but it turns out they no longer sell the thing I was looking for. I wanted one of those fluorescent fixtures with a built-in outlet, since this old bathroom has NO electrical outlets. However, it turns out you can still by a version of the light I was looking for, but intended for under-counter use. I bought the thing, but I hate messing with the electricity, so Richard manfully installed it while I was at work.  He also installed the "toilet topper" that we picked up at Menard's, which turned out to be way more trouble than it looked like for reasons too mundane to go into. He completed the hat trick by finishing the installation of the Gaudi tile in the shower - a project that had languished half finished for 7 years.

My lone contribution to all of this was to rehang The Cow, a lovely piece of ceramic art that hangs by the door to serve as a clothes hook. This would have been trivially easy if the kids had not, in an excess of plastering enthusiasm, carefully filled in and plastered over the large holes that I had drilled years ago for the molly bolts. Drilling new molly bolt holes in an old-fashioned lath and plaster wall is harder than you'd expect. I had to recharge the cordless drill 3 times to get through the lath. But I finished this morning and took the final set of pictures.
New light, shelves and the return of the cow New light, shelves and the return of the cow We replaced the broken sconce light with something completely different - thus giving us an outlet to plug the electric toothbrush into. The "toilet topper" was an impulse purchase at Menard's, providing much-needed storage space. The cow isn't new but had to be rehung.
Closeup of the Cow Closeup of the Cow I really missed old Bossie in the weeks she's been missing. There was no place to hang my robe when I took a shower.
Gaudi tile Gaudi tile While vacationing in Spain back in 2003 we bought this lovely ceramic tile (based on a Gaudi design) with the intent of using it to replace a missing tile in the shower. I started filling out the hole with layers of tile mastic almost immediately, but it took a lot of layers and I never finished it. Richard finally installed the tile. Looks great!


dreamshark: (sharon tire)
The great 2010 Bathroom Project is not quite finished, but the before and after shots are starting to come out...
Window Wall - before Window Wall - after
Window Wall - before This picture sums up the state of the bathroom better than any other. Window Wall - after Wow, what an improvement. Four or five decades of peeling paint - gone!
Towel rack - before Towel rack after
Towel rack - before Irreplaceable vintage wooden towel rack in a sad state. Towel rack after One coat of primer and one coat of high-glass enamel, and towel rack is restored to its former splendor. Richard handled this task, and also neatly rehung the ceramic plaques to good effect.
Northeast corner of bathroom ceiling - before Northeast corner of bathroom ceiling - after
Northeast corner of bathroom ceiling - before Yes, that's mildew up there, along with the peeling paint and ceiling cracks Northeast corner of bathroom ceiling - after Nothing much to see here. And that's the way it should be.

dreamshark: (sharon tire)
Darling [livejournal.com profile] ambertatge came to visit for a week and, taking pity on her aged parents, offered to help with a home project of some kind. There are so many projects that need doing it was hard to focus, but somehow we decided on "paint the bathroom." Even the main upstairs bathroom is small (6' x 8') and half the wall surface is covered with tile, so that doesn't sound like too big a job, right? Wrong. Sure, there's only 125 square feet of painted surface (including the ceiling) but when you consider how many coats of ancient scabby paint are on there it's more like 600 square feet. And that's without even considering the tragic state of the woodwork, which really can't be ignored. I'd thought about painting the bathroom many times over the years, but thinking about it made me actually look at the state of the walls, and that pretty much sapped all my energy. Amber was determined, however, so we committed to it and I arranged to take two days off work so I could be part of this.

The kids and I spent pretty much all day Wednesday and Thursday disinfecting and scraping and spackling and sanding and vacuuming and repeating, and by Thursday night weren't even close to ready to paint. Admittedly, I took a lot of breaks, partly because it was killing my back but mostly because two people in a 6' x 8' space is more than enough and three is impossible. Driven by guilt, I used my AWOL time mostly to do other house projects, so a lot got done. We all took Friday off for various reasons and returned to it today - still several hours away from uncorking the paint cans. Amber and I continued the sand/scrape/fill cycle on the woodwork for a while until Amber pronounced it time to stop futzing with the woodwork and start painting. That meant a couple of hours of taping plastic over all the tile surfaces and fixtures. Finally, well after noon, it was time to start on the ceiling. I can't remember when I last painted a ceiling, but it apparently left me with deep psychological scars and I just couldn't face it. So I just got out of the way and let the kids do it. Amazingly, they had the first coat on in about 40 minutes!

Now the first coat has to dry for two hours, so some of us are off to the Minnstf meeting. We're beginning to see light at the end of the tunnel!
dreamshark: (sharon tire)
June 13, 2010 - Back Wall Finally Achieved! June 13, 2010 [AFTER] - Back Wall Finally Achieved! After approximately 3 months of hard work, the back wall of the garage is finally visible. Note the absence of historic cast iron stove. It used to be in the center of the picture under the black circle, which is actually a rusted nub of stovepipe sticking out of the 2-story chimney.
May 9 - Back Wall Sighted May 9 [BEFORE] - Back Wall Sighted The back wall is behind the old wood stove, which is not even visible in this picture. See the black thing hanging out of the wall just to the left of the window? That's the rusted remains of the stove pipe emerging from the chimney. The stove is direclty under that. Trust me, it's there.
June 13, 2010 - Metal Man hits jackpot June 13, 2010 - Metal Man hits jackpot Here's the stove, finally extricated from the garage and ignominiously chucked into the alley for Metal Man to pick up. Counting the auxiliary pieces piled to the side, this must be at least 75 pounds of solid iron. We put it out on Sunday night. It was still there Monday night, but gone by Tuesday morning. It amazes me how quiet and discreet Metal Man is. The Minneapolis recycling truck makes more noise than a Transformer battle. But Metal Man slips in on little cat feet and makes all our unwanted metal quietly disappear.


dreamshark: (sharon tire)
----
Memorial Day: had a lovely time with [livejournal.com profile] minnehahaK pedaling around Lakewood Cemetery. I do this pretty much every Memorial Day, but have never managed to make it to the chapel when it was open. This year, [livejournal.com profile] minnehaha remembered that it was the chapel's 100-year anniversary and made sure we got there in time to take a quick tour before it closed. OMG, it is stunning! It's a lovely building on the outside and it is on the Historic Register, but I had no idea what was inside! (Hint: think 10 MILLION ceramic tiles). We also had other adventures: visiting the Lake Harriet Elfenheim, Sonny's ice cream, and (most amazing of all) spontaneously deciding to clean the scary playhouse in DreamPark's backyard. This developed from the garage cleaning obsession - I needed someplace to stow umpteen cans of half-dried up paint while they completed the drying up process so they could be legally tossed in the garbage and minnehaha brilliantly suggested the playhouse, since it's up in the air and nobody ever goes there. I was relieved to find that nobody was living in the playhouse, not even raccoons. Not surprised to find all that old furniture or the dust-covered Ouija board. But I was a little nonplussed by the full set of bocce balls. Lots of old candles and matches, and a few more disreputable items I'd rather not think about. (Oh, [livejournal.com profile] ambertatge, what were you and your friends doing up here?)

-----
Garage cleaning continues - almost every weekend I haul out a full trash can of debris and several offerings for Metal Man. Missed last weekend, but there is a full can of trash out there that I intend to get to as soon as I post this. Not only that - I have finally worked my way back to the rusted old wood stove at the very back of the garage. I kind of hate to throw it away, but some of the moving parts have rusted to immovability so it is probably of no interest to anybody except scrap metal scavengers at this point. *sigh*

-----
Continuing to work on exercise program for SI joint and related musculature. It's slow and frustrating. I need to build up strength in back and core, but every time I do anything challenging enough to actually do that (e.g., an exercise class or ice skating) my back is sore for days. I had been planning to skate twice a week and do one or two Pilates classes, but that's way too much. It looks like the most I can handle at this point is two classes or skating sessions per week. On off days I try to walk or do a little light biking, but can't always fit it in. My skating classes started up again last Monday. I skated for an hour and actually did fairly well. Not exactly PROGRESS, but I was almost back to where I had been when classes stopped in March: front crossovers easy, left back crossover easy, right back crossover challenging but doable, RFO 3-turns passable but sloppy. Felt pretty good. But my back was sore for the next 3 days, so I didn't even try to repeat the Wednesday Pilates class that did me in the week before. By Thursday I felt pretty good, and tried a different core strengthening class called BOSU. I liked it a lot. Felt GREAT afterwards. Next day my back hurt again, and even more on Saturday. Today back has unclenched enough that I could do another class, but if I did that my back would be too sore for skating tomorrow. So I'm planning to compromise with an easy workout and swimming at the Blaisdell Y.

----
Started deep cleaning of bedroom yesterday. Goal is to clean off the dresser so I can unearth and discard the enormous old tube-based tuner under all the clutter. It's been years since it worked well enough to be worth turning on. I managed to get down to the bare dresser top by yesterday evening, but I now have 3 boxes of little bottles, handkerchiefs, feather masks, travel toothbrushes, etc. etc. that need to be sorted. One of the last things I unearthed was a long-dried up bottle of Dr. Bronner's Magic Soap (Peppermint Castille), which segued nicely to the next item.

----
Last night Richard and I watched an obscure documentary on Dr. Bronner himself ("Dr. Bronner's Magic Soapbox"). As anyone who has ever seen a bottle of the Magic Soap has long ago realized, the good doctor was pretty nuts. He was, however, a master soap maker from a family that had been manufacturing soap in Germany for 7 generations until the family business was destroyed by the Nazis (along with both of Dr. Bronner's parents). Young Emil had already emigrated to America and had been trying to get his parents to join him as the Nazis were coming to power but they wouldn't leave Germany and their family business. It's not clear if the slaughter of his family is what pushed him over the edge or if it was other family tragedies, but he descended into a kind of gentle madness based on an intense desire to found a world religion based on peace and organic aromatic soap products. Although he was hardly the model father, somehow his sons and grandsons stuck with the family business and they are still at it. It's a strange tale, balanced somewhere between inspirational and disturbing. It also made me remember what a remarkable substance that soap really is. I think it's time to buy another bottle.
dreamshark: (sharon tire)
I think it has something to do with home brewing, so I thought maybe the home brewers reading this might be interested. Or you could use it as a very large vase. Fill it with marbles. Save pennies in it.
Big Bottle - about 2 feet tall. Big Bottle - about 2 feet tall. It was in the attic of the garage.